Assign an Activity to a Group or Grouping in Moodle

Emmanuel
Last Update för 5 år sedan
On This Page:You will learn how to:
- Assign an Activity to a Grouping
- Use Restrict Access to Assign an Activity to Groups
Use Groups in Moodle, to assign a particular activity (or all course activities) to groups of students. Groups can be especially useful for activities where students interact with one another. With forums, wikis, and databases, students in the same group can post and reply only to each other. Each group member always works in their own group, but you can control whether or not they can see contributions of members of other groups.
Before you begin, please note that if you are using a Moodle Assignment activity there are two ways to use groups:
- Each student in a group submits individually
If you follow the instructions below for an assignment activity, each student will make their own submission(s), and will not be able to interact or see other student's postings. If you want students to be able to see each other's work, consider using a Forum, Wiki, or Database instead of an assignment.
- A group of students work together to make a common assignment submission
See Configure & Grade Group Assignments in Moodle if you want students in a group to make a common submission that represents their joint work. The group submission will not be visible to other groups. If you want students to be able to see each other's work, consider using a Forum, Wiki, or Database instead of an assignment
Assign an Activity to a Group
Group is a collection of members in a course, and you can assign activities to specific groups as needed.
Step 1
To assign a specific activity to a group, you must first set up the group. For detailed instructions on making a group, refer to Create & Modify Groups in Moodle
Here is a quick guide on how to create a group
- On your course page, select the Course Management button (black gear icon top right). The Course Management panel will open.
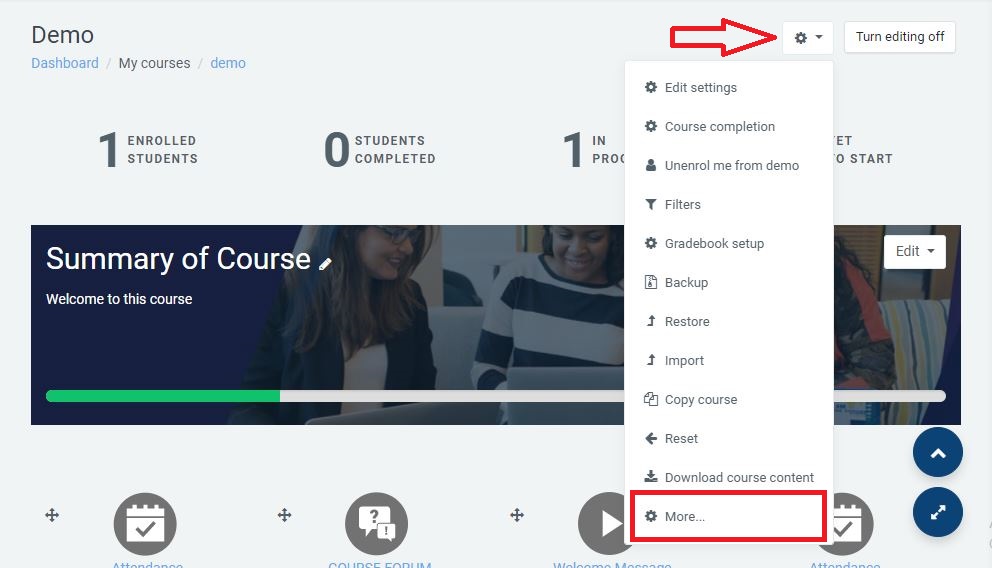
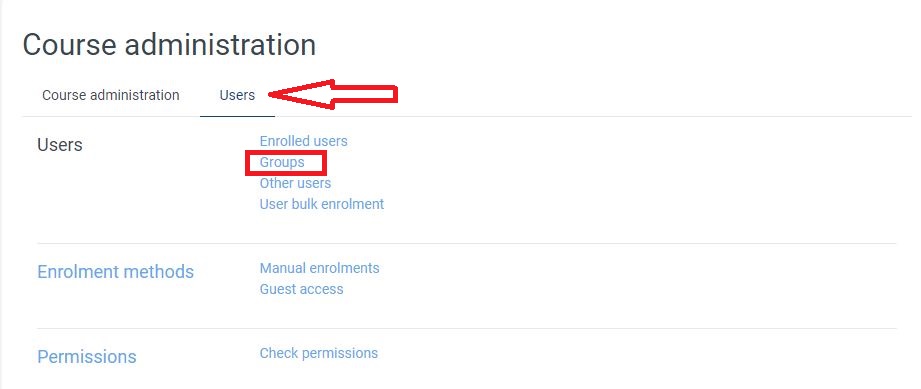
- On the Course Management panel, under User Links, select Groups. The Groups page will open.
- Scroll down the page and Click Create group. The Create group page will open.
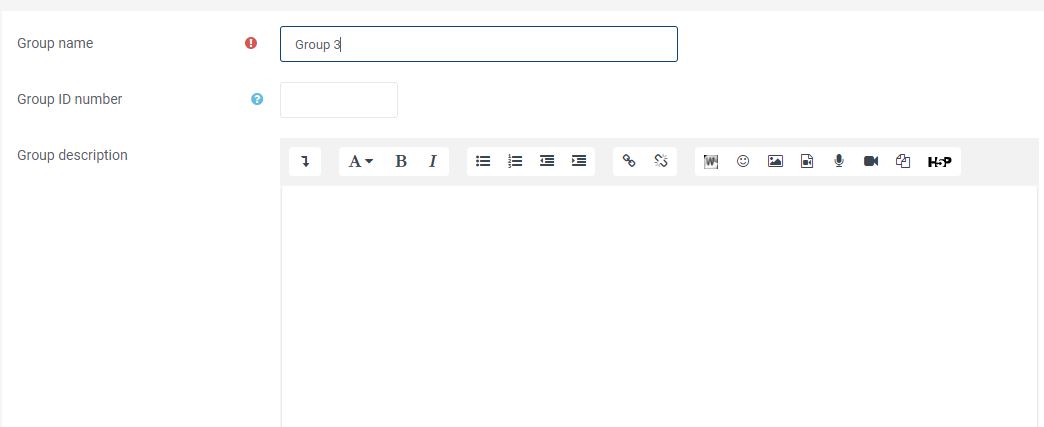
- Click Save changes to create the group. You will be returned to the Groups page where your new Group will be listed in the left column, with (0) indicating the number of students in the group.
Add & Modify Group Members
- On the Groups page, under Groups (left column), click the group name. The group name will be highlighted, and the Members of... column (at right), will list any course members who have already been added to the group.
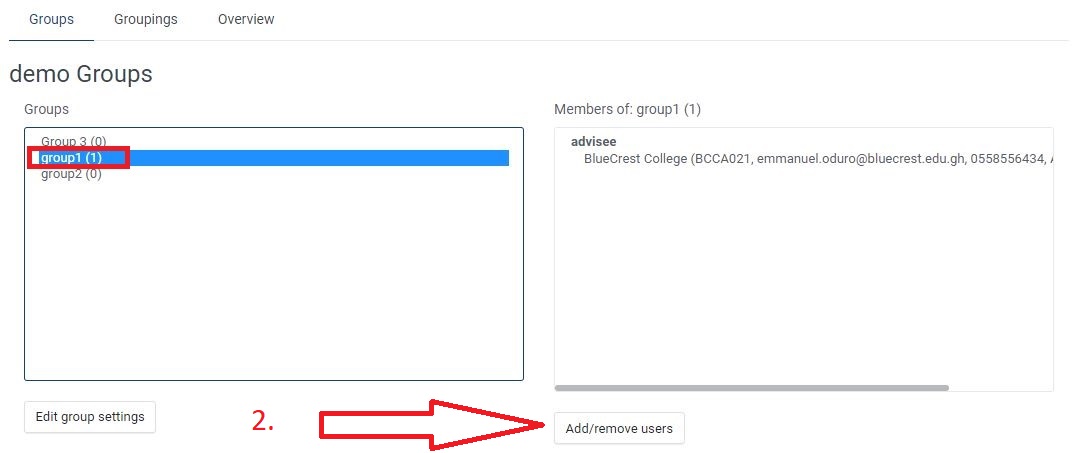
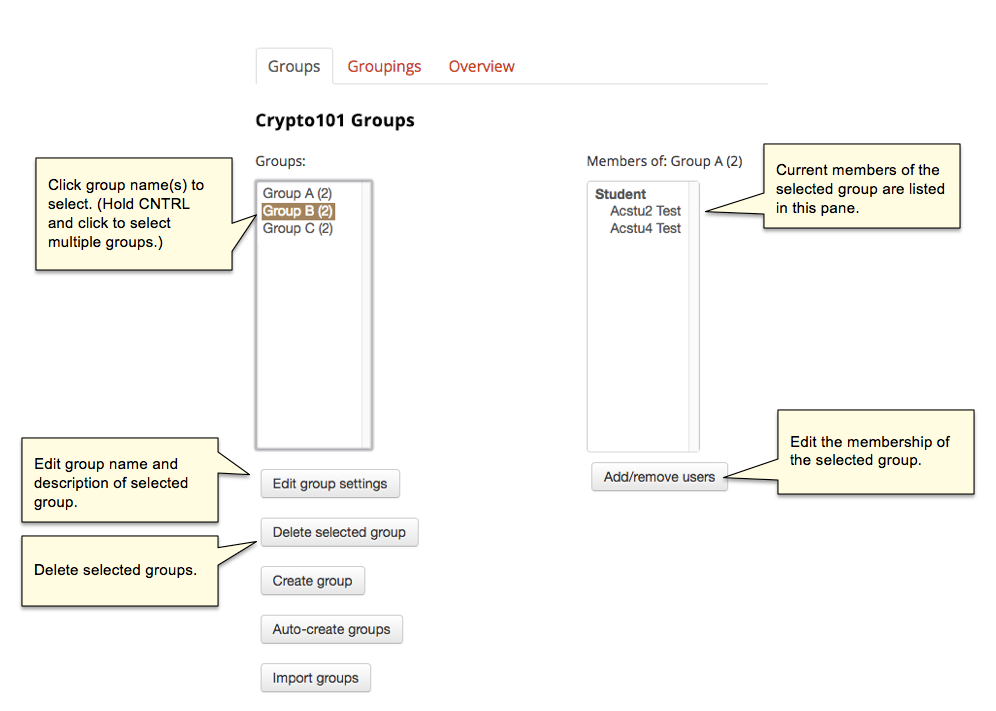
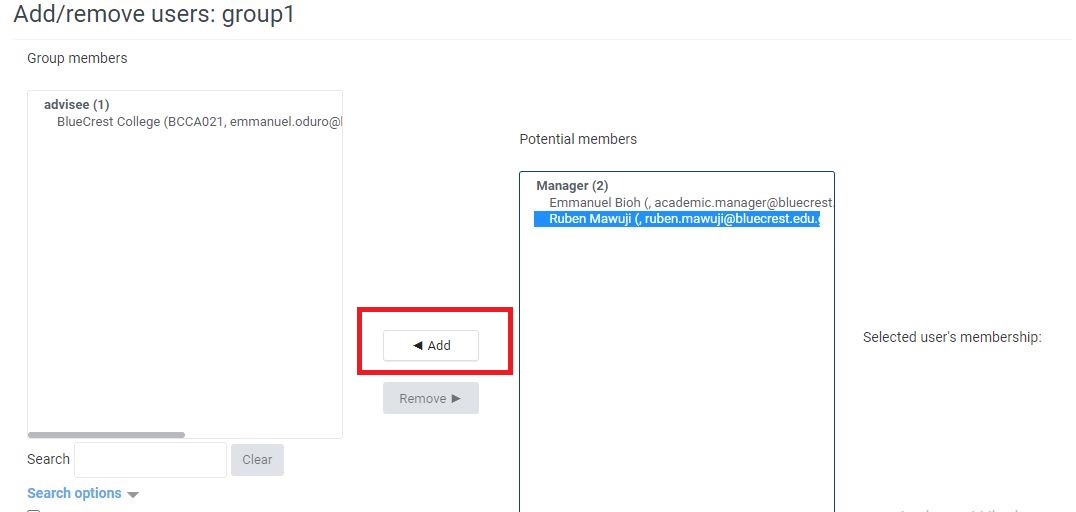
On the Add/remove users page, the left column lists current group members and the right column lists potential group members.
To Add students to a group:
In the Potential members column (at right), click a Student name to highlight it.
• To select multiple members, hold down the CTRL (Win) or Command (Mac) key while you click.
• If you don't see the student names you're looking for, use the search bar at the bottom of the column.
Once you've selected the names you want to add, click Add to move students into the group. The students' names will be added to the Group members list (at left) and will no longer appear on the Potential members list.
To remove students from a group:
In the Group members column (at left), click student names, or to select multiple names, press CTRL - click (Win) or Command - click (Mac), then click Remove. The names will be removed from the group and returned to the Potential members column.
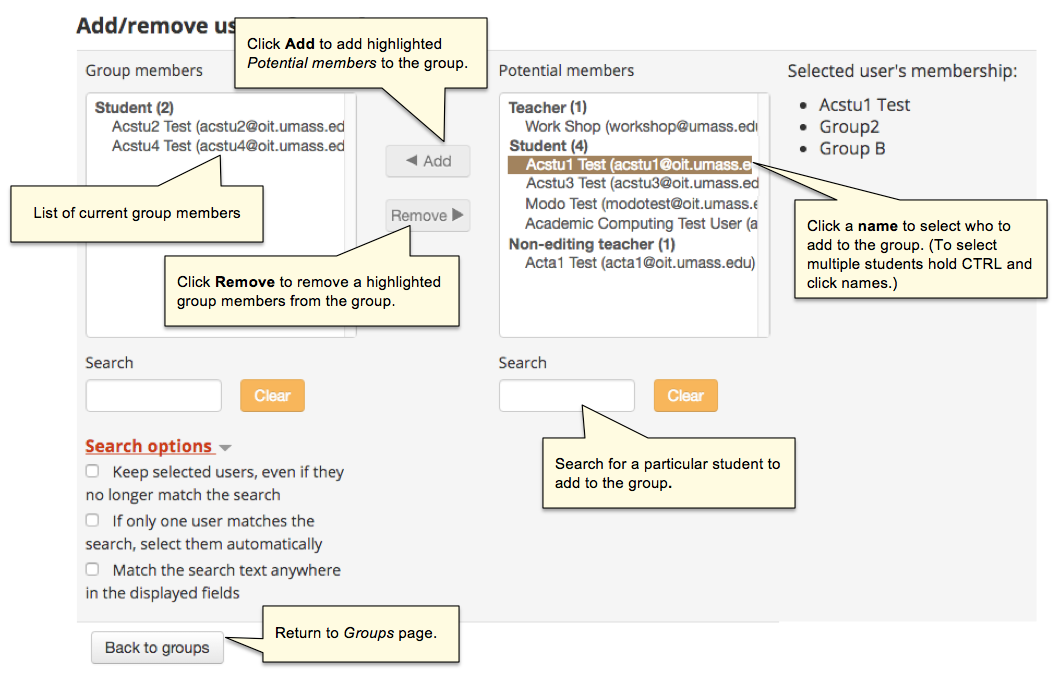
When you are finished modifying the group members, click Back to groups.
Once you have set up the groups, return to the course page and follow the steps below to add the restrictions to the activities.
Step 2
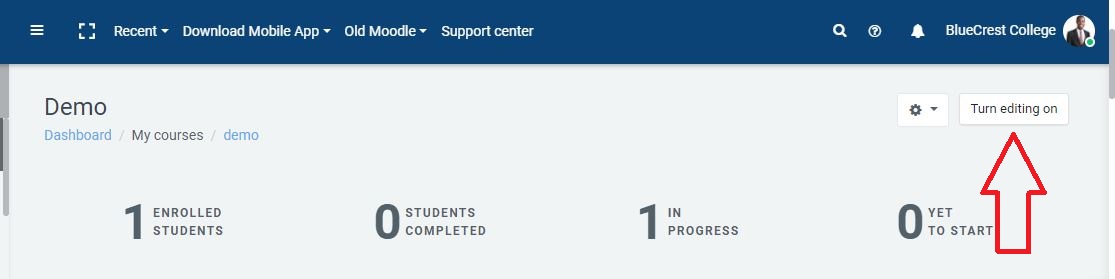
On your course page, click Turn editing on (top right).
Step 3
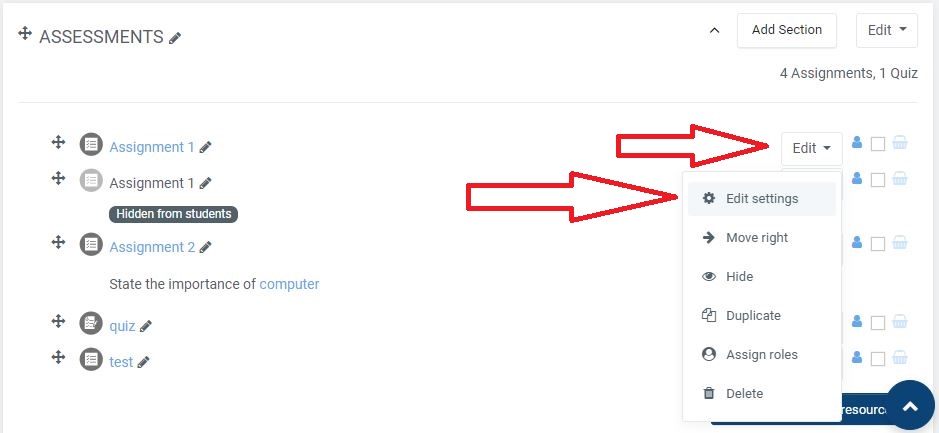
Add the activity you will assign to groups (see About Adding Activities to a Moodle Course), or if the activity has already been added to the course, click Edit (at right of activity), then Edit settings. The activity's Settings page will open.
Use Restrict Access to Assign an Activity to Groups
Restrict access can be used in a variety of ways in Moodle to limit the access to your activities:
- Restrict access can be used to assign an activity to a particular group without having to use a grouping. For example, you can create an activity for only one section of a multiple-section course, such as an honors or graduate section. Or, you can create an assignment activity or quiz and restrict to only selected students in the course.
- You can also use Restrict access to assign an activity to course members who are not in a particular group or grouping, or, by adding multiple restrictions, a mix of Groups or Groupings.
Step 4
Under Restrict access option, click Add restriction....
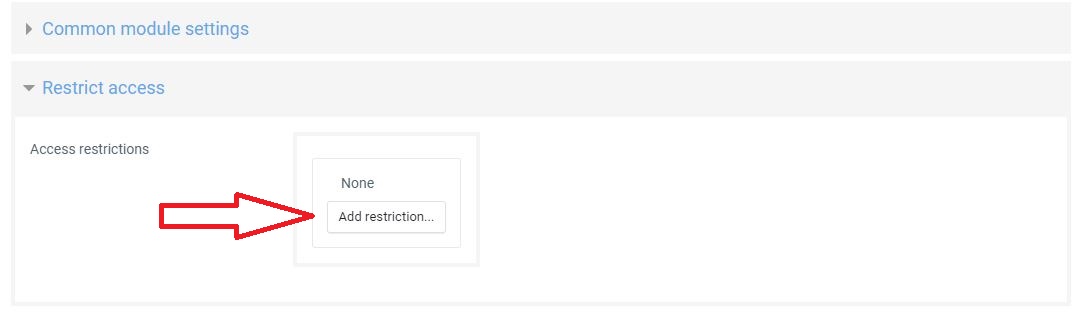
The Add restriction... pop-up opens.
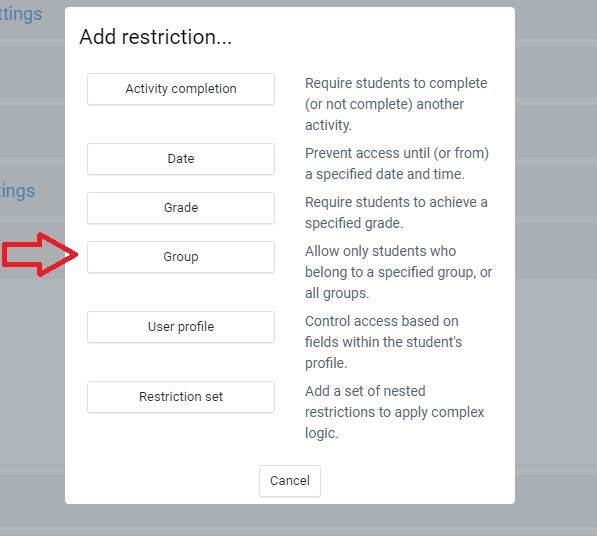
Step 5
In the Add restriction... pop-up, click Group. A new restriction will appear on the Settings page and the pop-up will close.
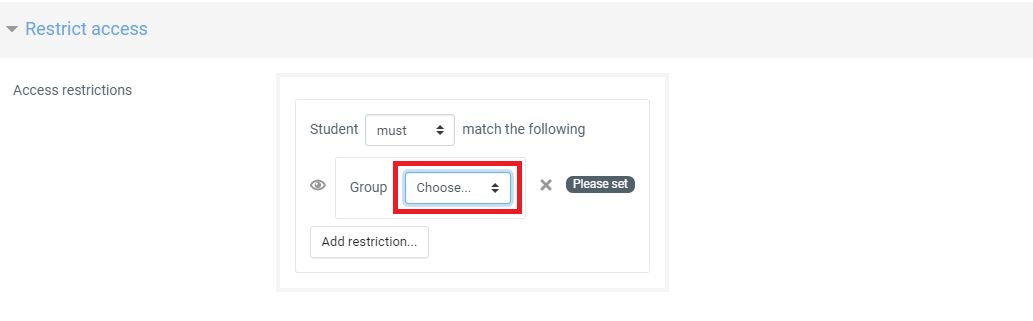
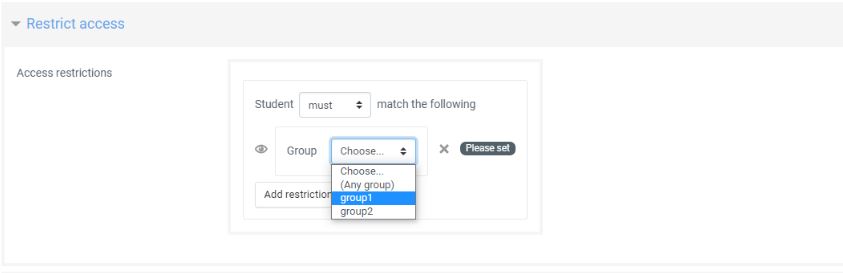
Click to select the group that has to access the activity. In the example above, group 1 is selected because the assignment activity is strictly restricted to only members in group 1
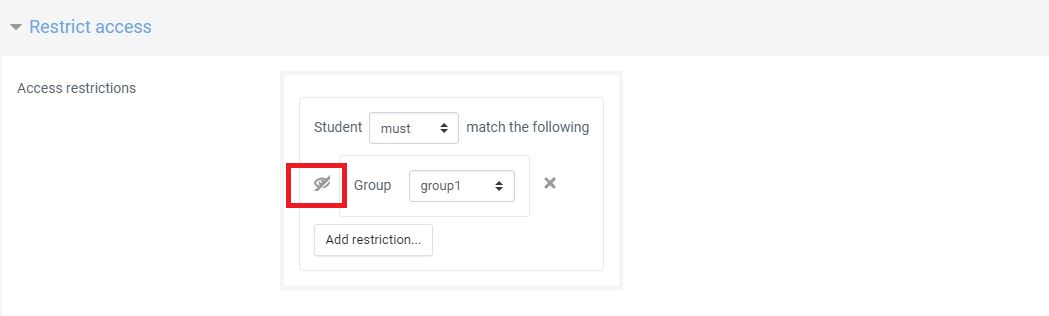
Note: Make sure the eye at the left of 'group' as shown in the diagram below is marked out or crossed. This is so that, no other members in the course or in any other group would be able to see the assignment activity for the particular group it is intended for.
Step 6
Click Save and return to course
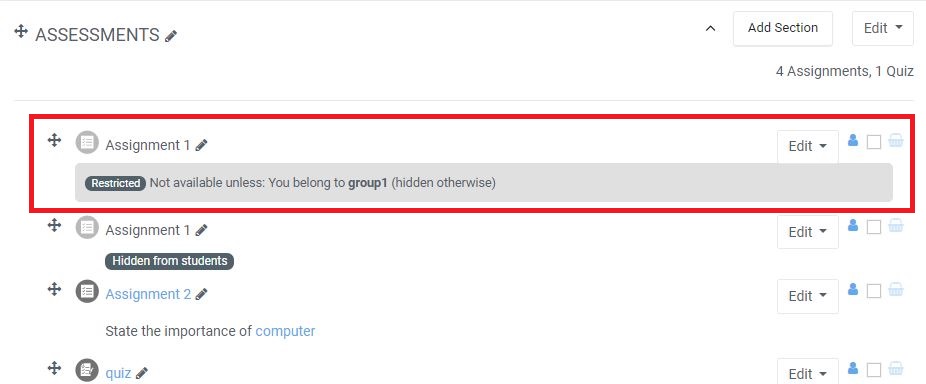
The Activity on the course page after following the tutorial should look like the image below with the inscriptions 'Restricted : Not available unless: You belong to group... (hidden otherwise)'
Here is a supplementary video for your reference as well