Add or Remove Sections in a Moodle Course

figo
Last Update hace 5 años
On This Page:
- Add or Remove Sections From the Bottom of the Course Page
- Set the Number of Sections from the Course Settings Page
- Hide/Show Sections from Students
- Delete a Section
- Edit a Section Name or Summary
- Hide or Show Section Summaries with Collapsed Topics Format
Add or Remove Sections from the Bottom of the Course Page
To add more sections to or remove extra sections from your course page:
Step 1
On your course page, click Turn editing on (green pencil icon Turn editing on (green pencil icon), top right). Editing icons and links will appear.
Step 2
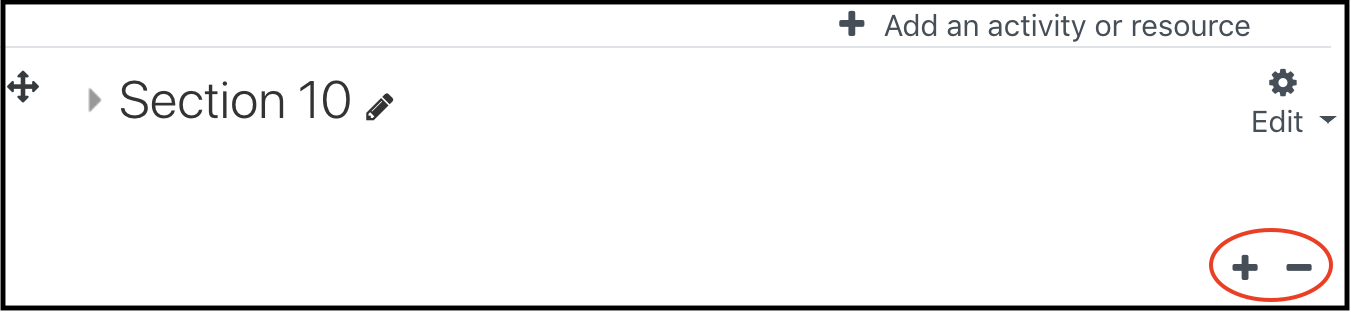
Scroll to the bottom of the page and, below the last section, look for the small + and - icons (at right).
Step 3
• Click the plus (+) to add an additional section to the bottom of the page.
• Click the minus (-) to remove the bottom section from the page.
Step 4
If you remove a section containing resources or activities, a new section called Orphaned activities will appear, preserving the content. You can move the items into another section, delete them, or leave them for later use.
Note: The Orphaned activities section displays for instructors when Turn editing is on but is hidden from students.
Set the Number of Sections from the Course Settings Page
You can change the number of sections from the Course Settings page.
Step 1
On your course page, select Course management (black gear icon Course Management button (black background, white gear icon), top right). The Course Management panel will open.
Step 2
On the Course Management panel, under Course settings, select Edit course settings. The Edit course settings page will open.
Step 3
On the Edit course setting page, locate and open Course format. The formatting options for course format will open. Use the Number of sections drop-down menu to select how many sections you want to show on the course page (choose from 0 to 52 sections).
Step 4
Scroll to the bottom of the page and click Save and display. Your course page will update to show the number of sections you selected.
If you remove sections containing resources or activities, new sections called Orphaned activities will appear, preserving the content. You can move the items into another section, delete them, or leave them for later use.
Note: Orphaned activities sections display for instructors when Turn editing is on but are hidden from students.
Hide/Show Sections from Students
As an instructor, you can hide a section from students without removing it from the course page. You can also control whether students see only the names (headings at the top) of hidden sections but none of the contents, or whether hidden sections will be completely invisible to students.
To Hide or Show sections on your course page:
Step 1
On your course page, click Turn editing on (green pencil icon Turn editing on (green pencil icon), top right). The Edit icons will appear.
Step 2
Locate the Section you wish to hide. At the right of a Section, select Edit. The Edit drop-down menu will appear.
- To hide the Section, select Hide section. The section will be colored light grey, indicating it is hidden.
- To show a hidden section, click Show section. The Section will appear in normal coloring, indicating it visible.
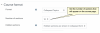
Note: In the instructor's view of a hidden section, the content will always be displayed in grey text rather than hidden entirely, regardless of the settings chosen in the Edit course settings page. For the hidden sections, the instructor will see the words Screenshot of hidden students sign that will be displayed below the Section name.
Step 1
On your course page, select Course management (black gear icon Course Management button (black background, white gear icon), top right), and the Course Management panel will open.
Step 2
On the Course Management panel, under Course settings, select Edit course settings. The Edit course settings page will open.
Step 3
On the Edit course settings page locate and open Course format. The formatting options for course format will open.
Step 4
For Hidden sections, use the drop-down menu to choose between:
• Hidden sections are shown in collapsed form
For students, only the names of hidden sections show on the course page.

• Hidden sections are completely invisible
Hidden sections are completely hidden from students.
Step 5
Scroll to the bottom of the page and click Save and display. You will be returned to your course page.
Delete a Section
Deleting a section also deletes any content or activities it contains. This includes student submissions and grades in the gradebook associated with the activities, including assignment and quiz grades. If you wish to save this content, you must move it into another section on your course page. (Instructors often hide a section from students for this purpose: See Hide/Show Sections from Students (above).)
Important! Once a section is deleted, it cannot be recovered. Make absolutely sure you have saved and moved all material you wish to keep before deleting the section. Note: Only individual resources and activities can be recovered from the Recycle bin (located in the Course management panel) within 7 days.
Step 1
Open your course page, click Turn editing on (green pencil icon Turn editing on (green pencil icon), top right). The Edit options will appear.
Step 2
Locate the section you want to delete. At the top right of the section, click Edit. The Edit drop-down will appear.
Step 3
From the Edit drop-down, click Delete section. This will open the Delete section page.
Step 4
You will be reminded that deleting a section will delete the activities contained within it. If you are certain you have moved any content you want to keep out of the section, click Delete. You will be brought back to your course page and the section will be gone.
Note: If you are using a grade calculation and delete a section containing activities which are used in that calculation, you must edit your grade calculation to remove those items.
Edit a Section Name or Summary
You can edit a Section name right on your course page:
Step 1
Click Turn editing on (green pencil icon Turn editing on (green pencil icon), top right), and locate the Section to edit.
Step 2
Next to the Section name, click the Pencil icon (Screenshot of turn editing on pencil icon). The Section name will be blank and you will see a blinking cursor or highlighted text.
Step 3
Enter the new name for the Section and to save changes, press enter/return on your keyboard.
Step 1
Click Turn editing on (green pencil icon Turn editing on (green pencil icon), top right). The Edit options will appear.
Step 2
Locate the Section to edit. At the top-right of the section, click Edit. The Edit drop-down will appear.
Step 3
From the Edit drop-down, click Edit section. This will bring you to the Edit section page.
To edit the Section name, select the Custom check box. Next, in the Section name field, enter the new name. On this page, you can also add a description. To add a description, in the Summary field enter a description.
Step 4
Scroll to the bottom of the page and click Save changes.
Hide or Show Section Summaries with Collapsed Topics Format
When using the Collapsed topics course format you can control whether or not to show the Section summary when a Section is collapsed:
Step 1
Select Course management (black gear icon Course Management button (black background, white gear icon), top right), and the Course Management panel will open.
Step 2
On the Course Management panel, under Course settings, select Edit course settings. The Edit course settings page will open.
Step 3
On the Edit course settings page, under Course format, for Show the section summary when collapsed choose Yes or No.
Step 4
Scroll to the bottom of the page and click Save and display.