Add a File to a Moodle Course

figo
Last Update 5 years ago
On This Page:
- Add Files using Drag and Drop
- Add a File using the "Add an activity or resource" Link
One of the ways to share a file with your students on Moodle is to add it to your course page as a Resource. File types you can add to Moodle include PDF, Word and other text documents, PowerPoint presentations, spreadsheets, zip files, and media such as image, video, and audio files.
Note: IT recommends that you use PDF when adding course materials such as readings or handouts.
To upload several files at once, see Add a Folder of Files to a Moodle Course.
Add Files using Drag and Drop
The fastest way to add files to Moodle is using "drag and drop," which lets you drag files from your computer directly into a Section, Topic or Weekly Section of a Moodle course. See Drag and Drop Upload in Moodle.
Step 1.
On your main course page, click Turn editing on (top right).
Step 2.
Locate the Topic or Weekly Section where you will add the file. If you are using the Collapsed Topics format, open the section.
Step 3.
At the bottom right of the section, click + Add an activity or resource. The Activity chooser will open.
Step 4.
In the Activity chooser, scroll down to the Resources heading and select File. Then click Add.
Step 5.
The Adding a new file page will open.
On the Adding a new File page, enter a title for your file in the Name field (required). The name you enter will display as a link to the file on your main course page.
Step 6.
Under the Content heading, in the Select files area, click the Add ... (Add Icon Moodle 2.8 SS) icon or the Blue Arrow. The File picker will open.
Step 7.
To search for a file on your computer, select Upload a file (at left), then click Browse or Choose File (depending on your browser).

Double-click to select the file to upload. You will be returned to the File picker window.
Step 8.
In the File picker window, leave the Save as field blank and click Upload this file. You will be returned to the Adding a new file page.
Step 9.
Scroll down to the bottom of the page and click Save and return to course. You will be returned to your main course page.
Step 10.
Click the file link to make certain the file opens properly.
Step 11.
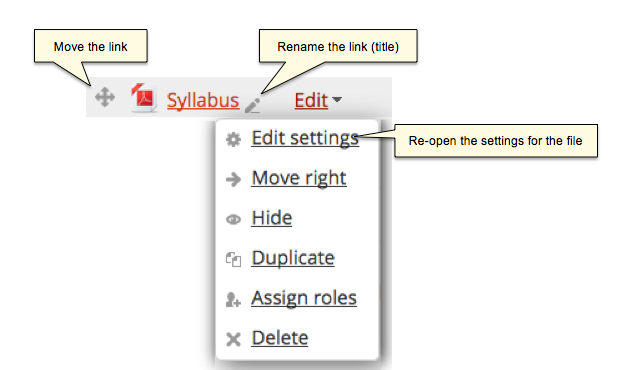
You can make adjustments by returning to your course page. On your main course page, click Turn editing on. Locate the link to the file:
- To adjust the settings, click Edit (at right), and from the Edit drop-down menu choose Edit settings.
- To rename the link, click the Edit title icon (Edit Title Icon Moodle 2.8 SS) (immediately to the right of the link), enter a new title, then press Enter/Return on your keyboard.
- To move the link from the bottom of the section, drag the Move resource icon (Move Icon Moodle 2.8 SS) for the link (at left).
(For details, see Reorder Sections or Items in your Moodle Course.)